Making homemade lollipops has proved to be one of my favorite activities with my kids thus far. They loved making these colorful, tasty creations. They were simple to make too.
Day #80 – Homemade Lollipops
March 20, 2012 by 47 Comments
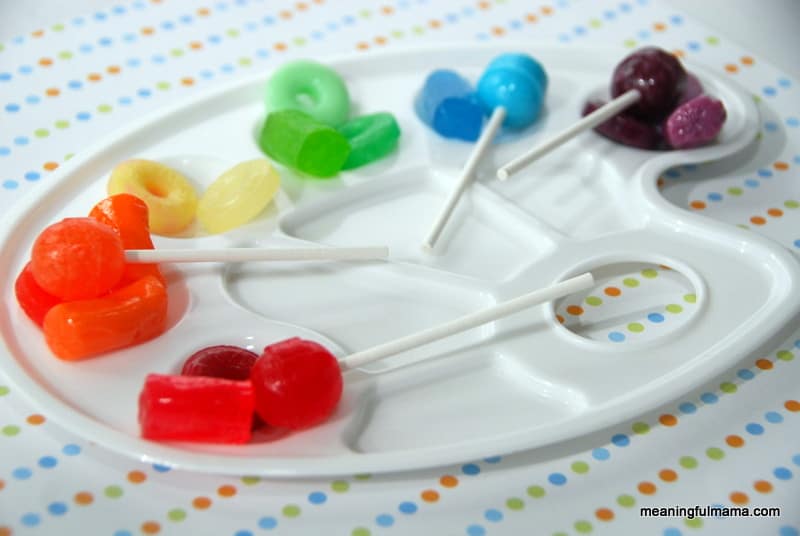
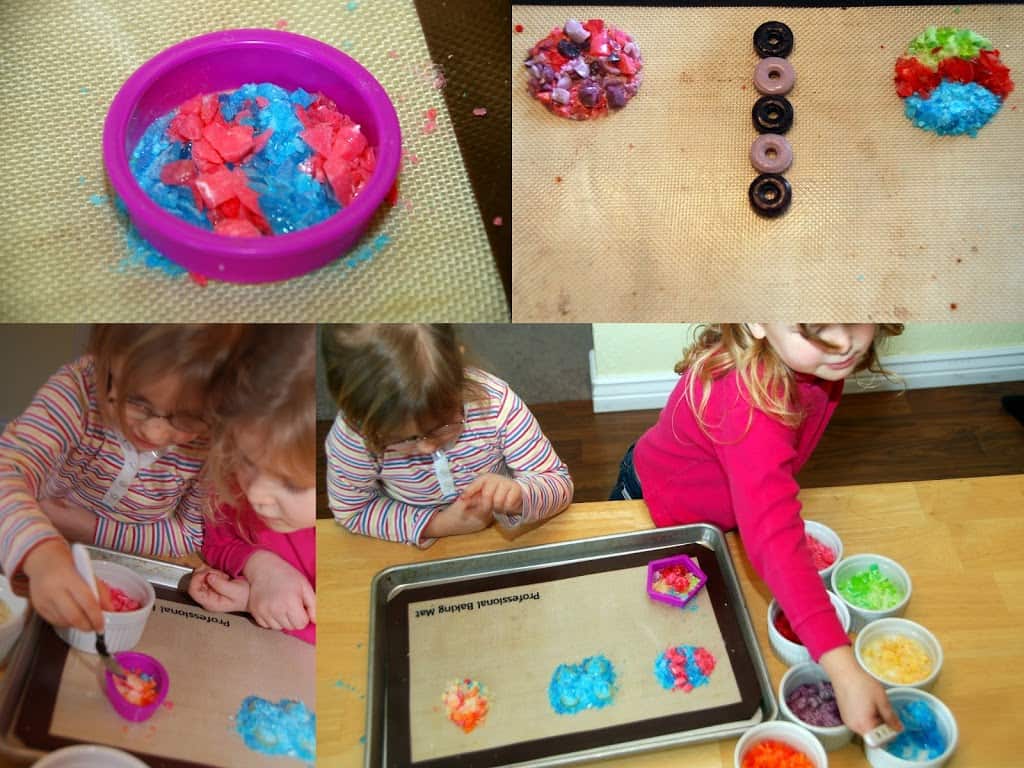
I bought a bunch of hard candies at the Dollar Store – Dum Dums, Life Savers and Jolly Ranchers. The kids had fun unwrapping them and sorting them into plastic bags based on color.
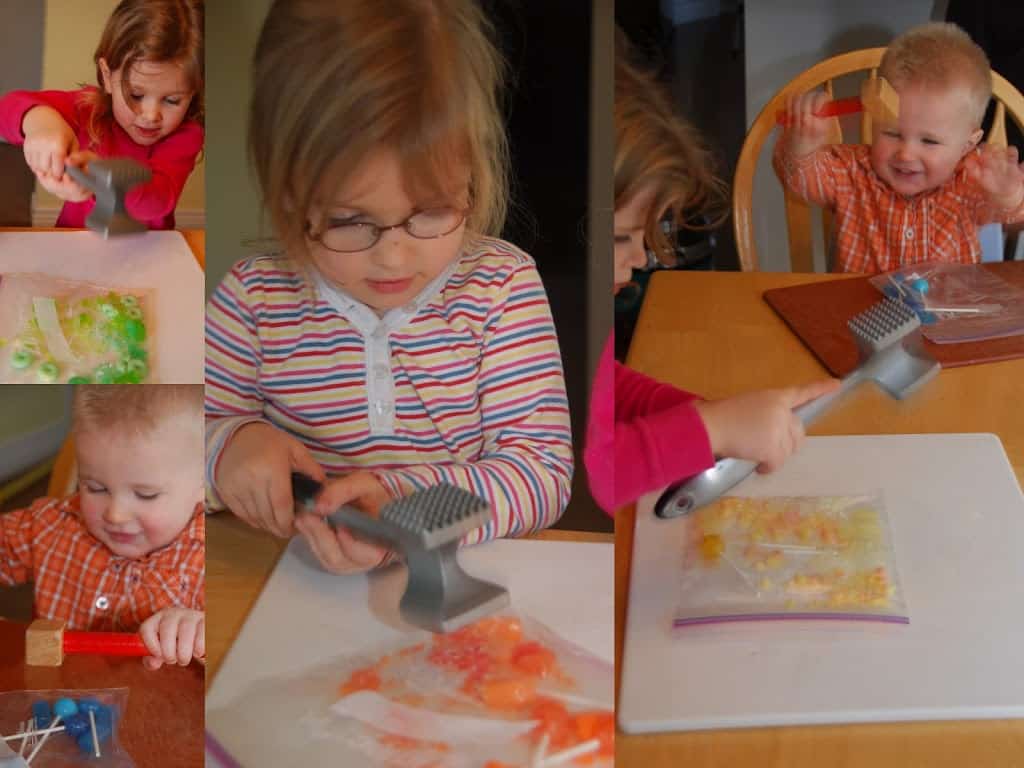
The next part was my son’s favorite part. Armed with a meat mallet for the girls and a toy hammer for the little guy, they started pounding away. It sounded like a wood shop in our house for a bit, but there were smiles on every face. Make sure to do this activity on a sturdy surface such as a thick bread board.
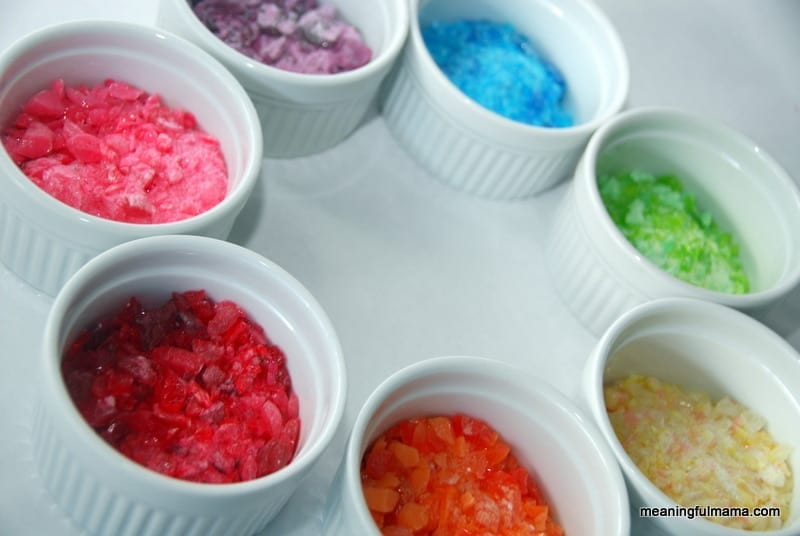
You will end up with a rainbow of crushed candy.
I used a silicone baking mat for the next step, but I imagine you could use parchment paper or foil. We did a variety of designs. It was easiest for the girls to dump the candies in cookie cutter shapes. The more complicated shapes like the pentagon didn’t end up looking like a pentagon. The circle or egg shape worked the best. We also used whole Life Savers to try and create certain designs. Sometimes, we didn’t use the cookie cutter at all and just created our own random shapes. You’ll want to layer your candies about 1/4 to 1/2 inch thick. Also make sure they are spaced 2 inches apart as they spread and you’ll need room to put the sticks in immediately.
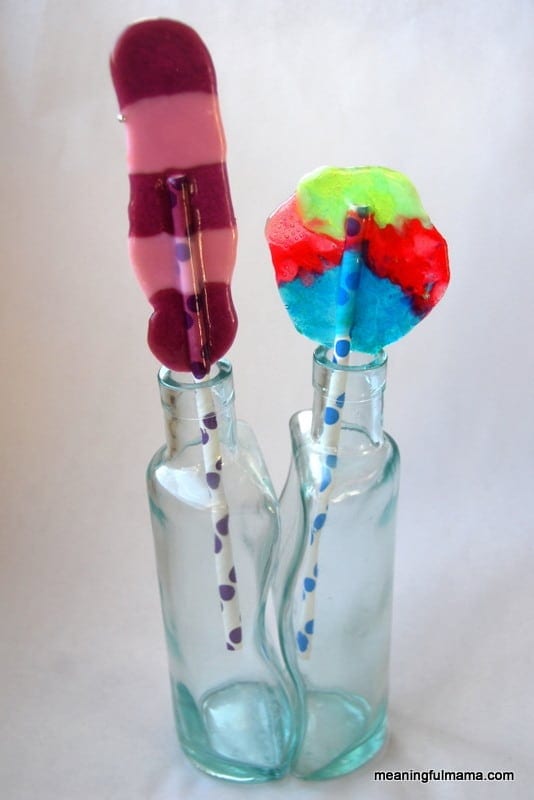
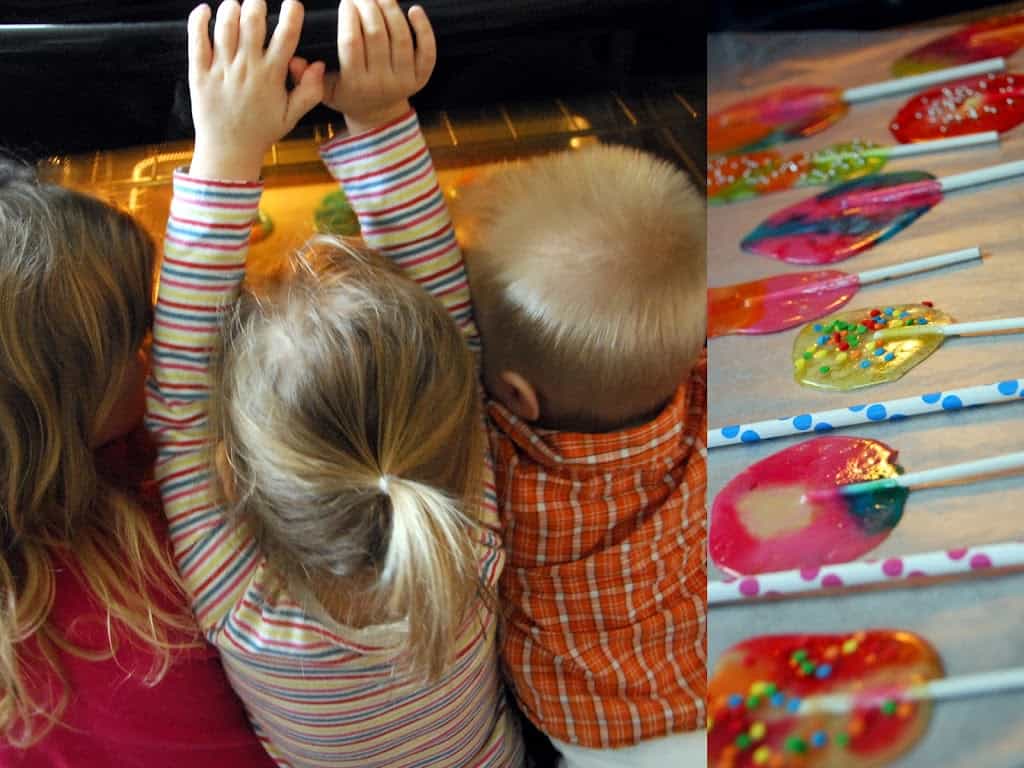
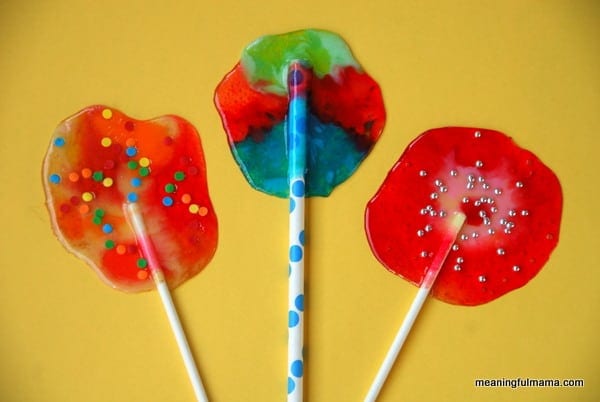
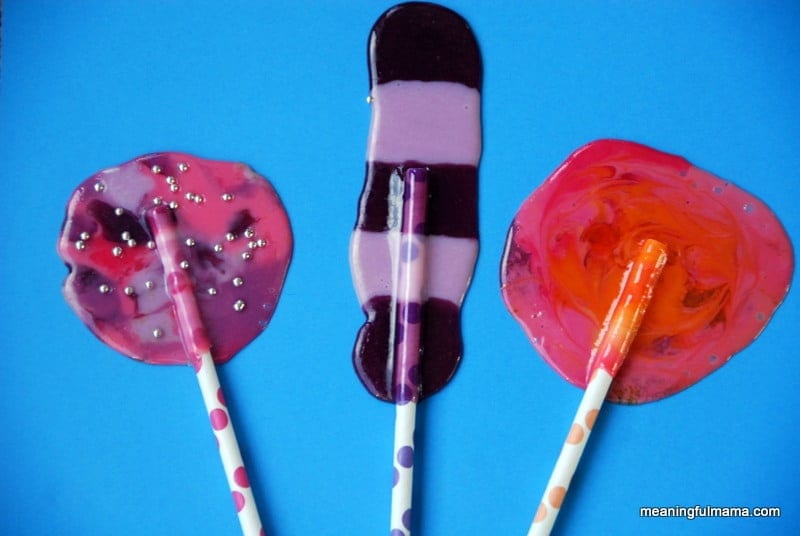
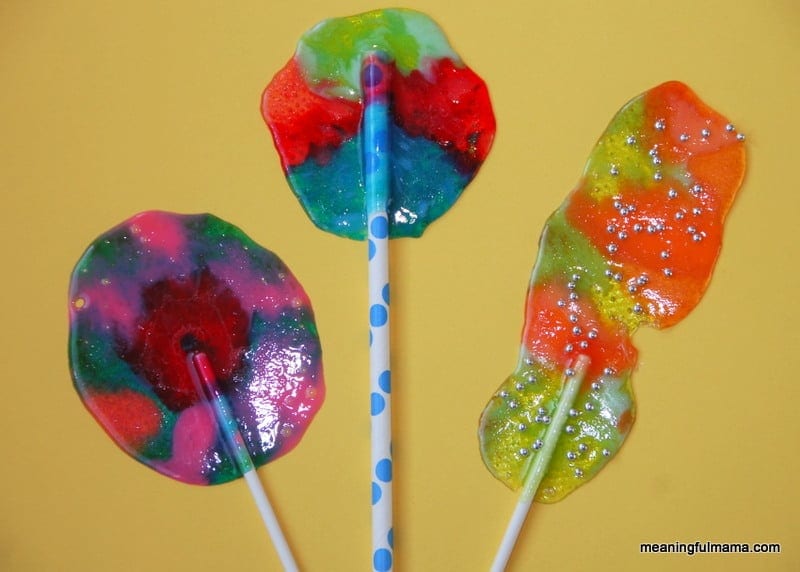
Make sure all cookie cutters are removed and then bake at 350 degrees for 5-7 minutes. After you remove the baking sheet from the oven, quickly attach a lollipop stick (found in the baking section of your local craft store) or paper straw (I had purchased these cute polka dot ones on Etsy) into the base of each melted lollipop shape. Carefully twist the stick to cover the end with the melted candy. If desired, quickly sprinkle on decorative candies or sprinkles onto the hot lollipops. Cool completely, and then peel off the baking sheet to serve. The bold, whimsical look of these lollipops would add a fun element to any celebration.
Comments
Trackbacks
-
[...] my eye on it until it was done. Let it cool before you lift if from the mat. It reminded me of the homemade lollipop project we did, which remains one of my favorite things we have done. It was now time for us to move [...]
-
[...] joint favorite pick was Homemade Lollipops submitted by Meaningful Mama.We love the fact that our kids could create their own unique lollipops! Jamie’s youngest and [...]








oooh!!! what a great idea!!! and i love that you put sprinkles in them. i think we will make these for all of the kids coming over for easter!!! thanks!
Let me know if you do. I would love to see your results. They all turn out so differently, and we all had a blast doing this one.
An amazing idea!!!!!!!!!!!!!!!!!! Wow…. I have to try this!
I am so glad you like it. It has seriously been my favorite activity with the girls thus far. Thanks!
What an interesting idea! I have not seen this before…
~Jamie
I did a Google image search before I did it and was surprised that it hadn’t been done…at least as far as I could find. There were some homemade lollipops that involved getting sugar to all the right temperatures and stuff. This was a lot more fun. Thanks!
These are sooooo fun! And the kids look like they had a ball making them. Definitely going on my “to make” list for sure! I’d love for you to stop by Etcetorize to share at the Make it Great party going on right now (http://etcetorize.blogspot.ca/2012/03/make-it-great-monday_18.html). Hope to see you there!
Sorry it took me so long to link up. It’s been a busy week. I’m glad you liked this post, and thanks for inviting me to your link party.
How original is this!! My girls would flip if we made some!
Thanks so much for sharing this at The DIY Dreamer… From Dream To Reality!
You should make some with them. It was really so much fun. Thanks for hosting and commenting!
THIS IS AWESOME!
Totally Trying This
It’s so easy and fun. I’m glad you want to do it.
These look so awesome. I can see how kids would LOVE it. I also love how you included the little guy by letting him hammer with the toy mallet. Thanks for linking up to Thinky Linky Thursday!
Lori @ Cachey Mama’s Classroom
Thanks so much, Lori. It really was fun.
Just to let you know I featured your wonderful lollipops on homework today. Come over and grab a featured button if you’d like. Have a great weekend.
Thank you so much. What a huge compliment.
We are so making these while on vacation at the ocean over Easter/Spring break. There will be 9 kids from 20 down to 1 there, 9 of whom are 13 and under. I cannot wait to do this. Thanks Jodi.
Oh cool. I’d love to see the outcome. You will have a blast. It’s definitely been my favorite project so far.
oooooo…I absolutely love this!!! So much fun for the kids too Thanks so much for sharing this with us at Sharing Saturday.
Thanks s o much, Mia. Thanks for hosting.
These look so fun!! And pretty too- love the picture with all of the crushed candies! Thanks for linking with Scout’s Sweet Sundays!!
Thanks for hosting an commenting. I appreciate it.
We just wanted to let you know that we’re featuring this on our page tomorrow! @toysinthedryer
Thank you so much for featuring this. I appreciate the exposure, and I’m glad you found it fun and interesting.
What a fun activity – and they came out SO cute!!
Beth (TGIF)
Thanks so much, Beth!
This is such an awesome idea and love how fun they look! We always have gobs of leftover candy so this is perfect. Thanks for sharing!
Thanks so much, Whitney. I hope you do it. It was lots of fun!
These are great! I have a Christmas cookbook from the 80′s that contains directions for making suckers and ornaments using this process. I loved making them when with my pre-kindergarten class when I was in college plus with my boys when they were younger. Thank you for reminding me about them!! I think we will make these when our youngest turns 13! (yeah think early teen boys, meat mallets, and candy!! ha ha!)
I love the thought of hanging them as ornaments. I will definitely need to do that come Christmas. Thanks so much!
Can you do them in the microwave,in candy molds?
I have no idea. What’s the material? I haven’t worked with a lot of candy molds…except for the plastic ones that hold chocolate.
Thank you so much for sharing your idea. I am going to try this with my 5 year old grandson. I know we are going to have a blast, making noise, lots of colors, time with each other, and enjoy something sweet. Thank you again.
He’ll love it. If you get the opportunity, I’d love to see pictures of your results. Thanks so much for taking the time to comment.
I babysit in my home, we just made these today, the kids loved it! i just recommend if using wax paper, spray the paper and they come up a lot easier, we used the nonflavor spray. we walked to the store to get more candies to make some more thanks for the awesome idea!
I wish you were a babysitter in my neck of the woods. I love that you come up with creative things to do. Great work. I had my suckers down on a silicon mat, so I didn’t have a problem. Your advice is really good though. Thanks for letting me know you tried it. It brings me joy.
Wow, great! That is the idea I needed!
Though it is something (very) sweet – a lot of sugar it is to enjoy all the work and creativity – might not be the taste that is most important
Thank you very much!
Cool – If you do it, I’d love to see the results. This remains one of my favorite activities.
Had to click on this one. How fun! All summer – if we’re not in a camp or on vacation – we have a theme for everyday of the week. Monday is our craft day. Wednesday is our Fun in the Kitchen day. Loving your ideas!
I would highly recommend this one. We had so much fun with it.
That is such a neat idea ! To make it, see, & eat them ! Great for when the grand kids come what fun ! They will love this
It looks like a fun thing to do
Love the colors and sprinkles in these! The purple one reminds me of a Dr. Seuss hat!
I absolutely love these! Will be making these with my kids for sure I can totally see these as party favors or holiday themed!
Melissa @ WillametteValleyWonderWoman.blogspot.com
Again so cute! I love these and am now following you to see what else you make!
have a great day!
Rebecca
http://www.heronscrafts.blogspot.com